Getting started
Your first run of Plexus: add a git repository, create a session in its own worktree, start Claude Code and send your first prompt.
This guide takes you from a fresh install to your first Claude Code session: add a repository, create a session in its own git worktree, and watch the agent go to work.
This walkthrough assumes Plexus is already installed and that the Claude Code CLI and git are on your PATH. If not, start with Install and Requirements.
Launch Plexus
Open the app. The left sidebar already holds a Default workspace, so you're never staring at an empty tree. A workspace is just a grouping for related repositories — rename it or add more whenever you like. For the full hierarchy behind workspaces, projects, and sessions, see Concepts.
Add a repository
A project is a single git repository. Hover the Default workspace row, open its ⋯ menu, and choose Add repository…. (An empty workspace also shows an inline + Add repository button.)
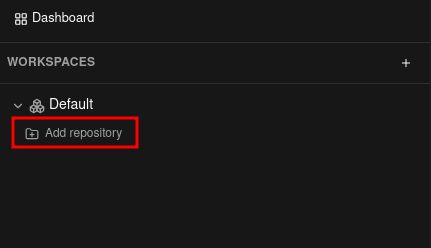 Start from the Default workspace's Add repository button.
The dialog offers three ways to add a repository — pick whichever fits:
From a local folder
Point Plexus at a git repository already on your machine.
- Pick a folder in the native picker. If the folder isn't a git repository, Plexus offers to run
git initfor you.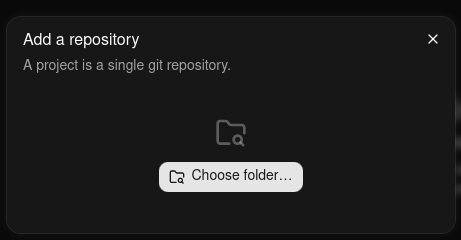 Choose the repository folder on disk.
 - Enter a project name and confirm.
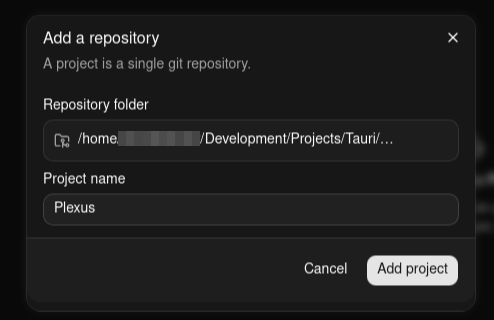 Name the project, then Add project.
The folder on disk is never moved or modified — Plexus just points at it.
From a connected provider
If you've connected GitHub or Bitbucket under Settings → Git ▸ Providers, search your repositories and clone the one you want — no URL to copy.
- Search your repositories — your own, ones you collaborate on, and your organizations' — across every provider you've connected, and select one. Typing filters by repository name, up to 100 shown, and the footnote under the list says how they're ordered (closest name matches first on GitHub, most recently updated first on Bitbucket); Refresh beside the search box re-reads the list if a repository you just created isn't there yet, and anything still missing can be added from its URL instead. Plexus always tells you what it actually searched: if the provider is slow or rate-limiting you, it shows what it could read and warns that the list may be missing repositories — Refresh retries it. On a very large account it searches your most recently updated repositories and says how many it got through, so a repository older than that window is added from its URL rather than found here.
- Choose a parent folder on disk. Plexus clones into a
<repo-name>subfolder of it; the folder name defaults to the repository name and is editable. - A live progress bar shows the clone's percentage and current phase, with a Cancel button if you change your mind. When it finishes, the cloned repository is registered as a project just like a local folder.
Private repositories authenticate automatically using the connection Plexus already holds — the token stays on your device, and the clone talks to GitHub or Bitbucket directly.
From a URL
Paste any https or ssh git URL to clone it.
- Paste the repository URL.
- Choose a parent folder, adjusting the destination folder name if you like (it defaults to the repository name).
- Watch the same live progress bar with Cancel, then Plexus registers the clone as a project.
ssh URLs and public repositories use your own local git setup — the keys and credentials git clone would use.
However you add it, the project appears in the tree under the workspace.
Create a session
A session is a named Claude Code conversation. On the project row, open the ⋯ menu and pick one of:
- New session… — name the session, then leave the mode on New branch and choose a base branch (a smart default is pre-selected). Plexus cuts a fresh worktree and feature branch from that base, keeping the work isolated from your main checkout. Switch the mode to Existing branch instead when the branch already exists — see Sessions & worktrees.
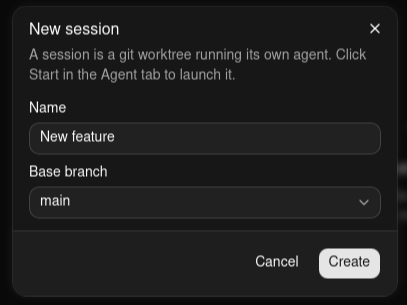 Name the session and pick a base branch, then Create.
 - Start session on root tree — name the session only, with no base-branch picker. It runs directly in the project's root working tree and starts immediately. Good for quick edits.
Start the agent
By default, both root-tree and standard sessions launch the moment you create them — a short "Starting…" spinner walks through the stages (creating the worktree, running any setup hooks, then starting the agent) before Claude Code appears in the Agent tab. Prefer to start standard sessions yourself? Click Start in the Agent tab.
Send your first prompt
In the Agent tab, type a prompt and press Enter. Watch the activity dot on the session row:
- green, pulsing — the agent is working,
- amber — it's waiting for your input or approval,
- gray — idle.
These same indicators surface on the Dashboard, so you can track several sessions at once. See Session status for what each state means.
| Enter | Submit your prompt to the agent |
| ⇧Enter | Insert a newline without submitting |
| ⌃C | Interrupt the agent mid-turn |
Explore the tabs
While the agent works, switch between the per-session tabs:
| Tab | What it shows |
|---|---|
| Agent | The live Claude Code terminal. |
| Review | A focused diff of the changes the agent has made. |
| Explorer | The session's working tree as a file browser. |
| Git | Branch status, commits, and staging. |
Read more about each: the Agent tab, Review tab, Explorer tab, and Git tab.
Next steps
- Understand the model in Concepts.
- Get gitignored files like
.envinto worktrees with Worktrees. - Wrap up by opening a pull request.
- Learn every shortcut on the Shortcuts page.
- Work on more than one computer? Cross-device sync makes the settings, workspaces and projects you just set up follow you to the next one — after showing you exactly what would leave this machine.